*Forewarning: this entry is long. If you’re just looking for the dough recipe, skip to the end. But you’re missing out on lots of laughs and fun. Bye.
Lately I have been obsessed with pizza. But not just any pizza, I’m talking authentic, Neapolitan style pizza cooked in a wood fired oven at extremely high temps with a thin, chewy crust, topped with simple, rustic ingredients. This obsession came to head when I was visiting my best friend, Carissa, in Boston last month. Her dad (Eddie Spaghetti), being the awesome Italian that he is, has a wood fired pizza oven in his backyard—cue praying hands emoji. So, you better believe I made Spaghetti whip me up a couple pies while I was there. Not only was it the best homemade za I’ve ever had, I also learned a lot about authentic, Italian cooking.
Of course, being on the East Coast also meant I had to try the local pizza, since LA pizza pales in comparison, according to every East Coaster, ever. Verdict? They’re right—kind of. The reason I say kind of is because I’ve come to realize that the east and west coast aren’t going for the same result when it comes to pizza, so it’s not really fair to compare the two. I discovered this when Carissa’s brother, Paula (his name is Paul, but I call him Paula because it’s cute) said that the West Coast tries to be “too fancy” with their pizza. The East Coast is good at keeping it classic with the basic, simple ingredients (think: cheese, pepperoni, and basil) whereas the West Coast tries to elevate their za with exotic ingredients (think: truffles, goat cheese, and duck bacon). So, if you ask me which one is better… I’d probably still say the East Coast, who am I kidding? But, I do have an appreciation for California’s creativity.
 And so, taking all my newfound knowledge and experience with pizza making, I ventured to the kitchen to create my own (sort of) authentic, Neapolitan style pizzas with a California twist. I dragged my brother along with me cause God knows I couldn’t be trusted with measuring cups alone.
Story Time
My brother (Stephen) travels a lot for work, so when he’s home we take advantage of spending time together. For us, this usually consists of cooking and drinking, usually simultaneously. So last week I proposed the idea of getting together to make some homemade pizza. I told him all about the pizza Spaghetti made on my trip, and suggested we try out the dough recipe. He was all in. Since the dough takes two days to rise he asked if I wanted to make the dough by myself, I repeat by myself, and then bring it over to his place when we were ready to cook. I politely reminded him that I need adult supervision when it comes to measuring, and then politely forced him to help me.
So, cut to, we’re in my kitchen very diligently measuring out the all ingredients (there’s four ingredients in this recipe) when he gets a phone call and leaves the room. I decide to carry on with the measuring and before I know it, I’ve added two tablespoons of salt instead of two teaspoons. Oops. He looked away for five seconds and I’ve already ruined everything. When he comes back to the kitchen he simply picks out most of the salt with his fingers (genius) and we call it good.
Now that we’ve combined all the dry ingredients, it’s time to add the water and form the dough. Stephen pours the water in little by little while I mix it together with my hands. So far, so good. When we near the end of this process, Stephen thinks the dough looks too dry and suggests we add more water. I don’t really think it needs more water, but I enthusiastically agree anyway and we add the water. Oops numero deux. The dough turns into a sticky, hot mess. I’m a little worried at this point, but secretly happy I wasn’t the only one that made a mistake, today. We both decide that adding more flour seems like a legit solution, so we keep adding flour until we feel it looks right.
Next comes the fold and stretch. The recipe does not describe how exactly you’re supposed to “fold and stretch” the dough, so Stephen just decides to stretch the hell out of it at all angles and mangle it into a ball. I think I have a better idea of how to do this, so I try it out and Stephen agrees it’s more civilized, and we press on.
Alas, the dough is done. We wipe the sweat off our brows and high five each other in the form of downing a bottle of wine. We deserve it.
Pizza Time
The recipe makes about four pizzas, so we both came up with a couple ideas for each pizza, all inspired by noteworthy zas we’ve encountered in the past. We split it up into four courses. I created courses one and two, Stephen did course three, and we both (along with Stephen’s girlfriend, Adriana) created the fourth course.
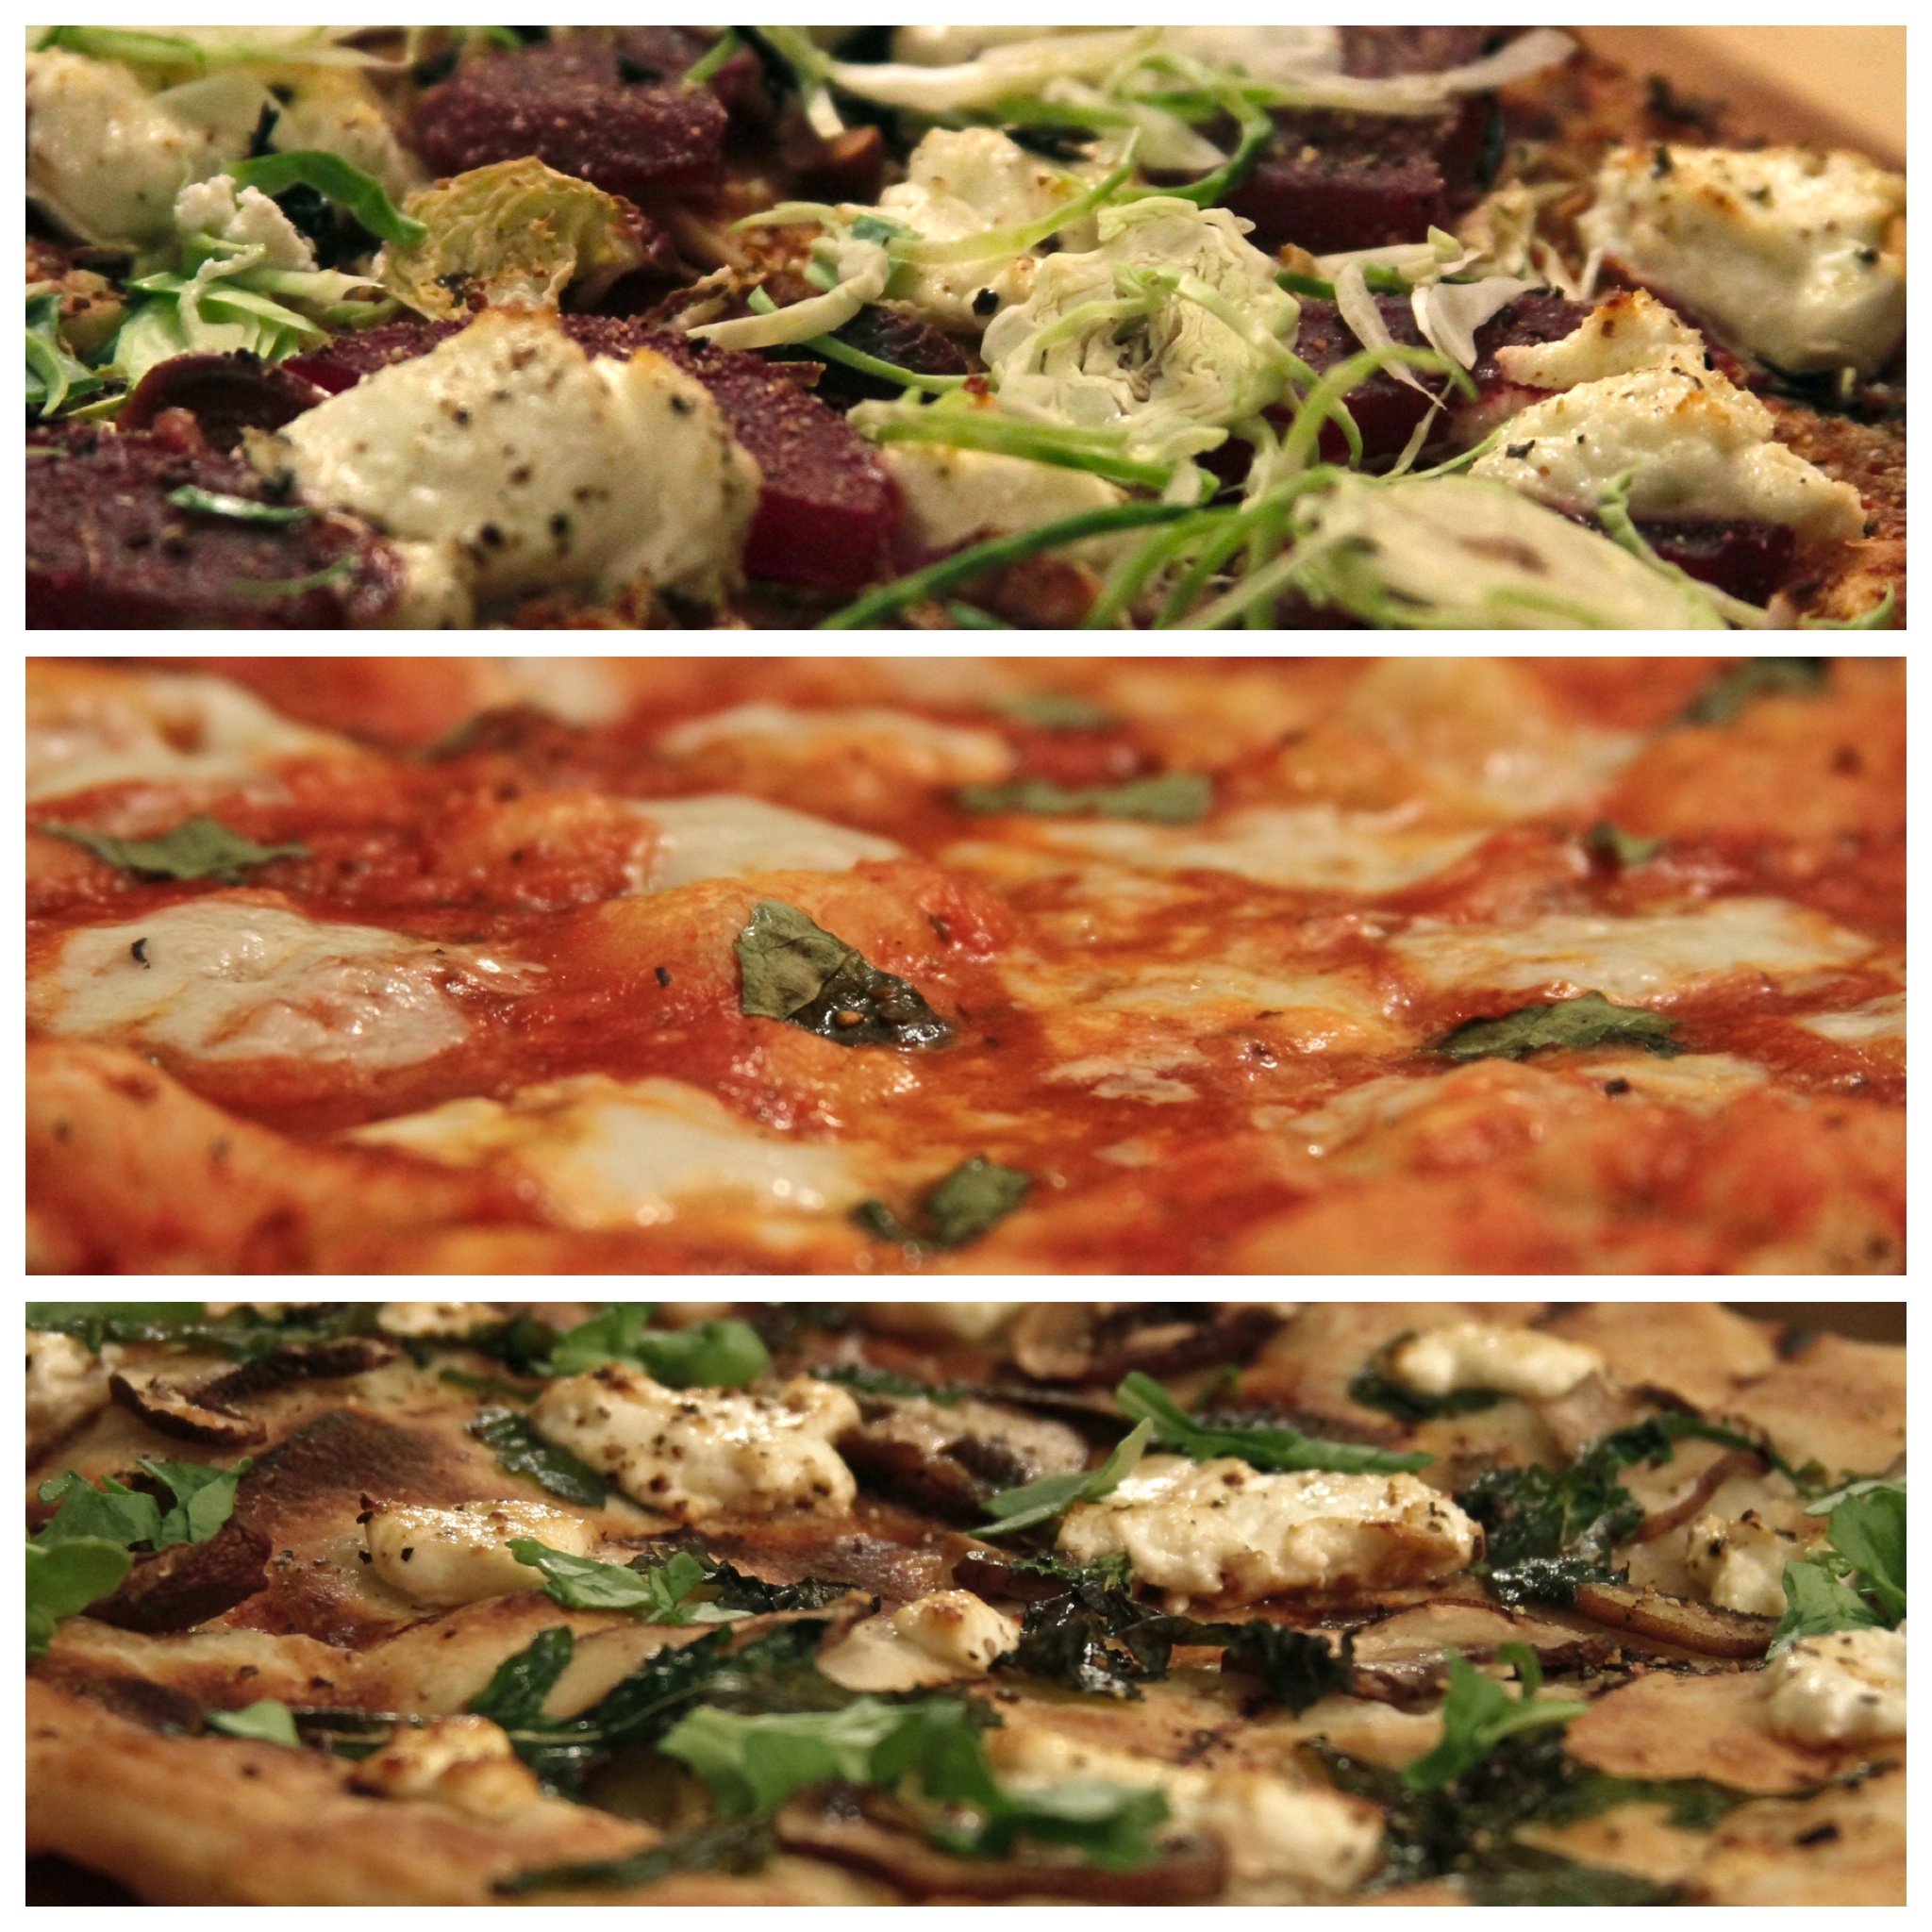
- Course one: Margherita
- Course two: Mushroom, truffle oil, and arugula
- Course three: Roasted curry carrot with beets and shaved Brussels sprouts
- Course four: Proscuitto, sage, and fig jam
Unfortunately none of us have a wood fired pizza oven, or a backyard for that matter, so we decided to grill the pizza instead of putting it in an oven (with the exception of course four).
Course one: Margherita

Ingredients
bufala mozzarella
fresh basil
red sauce*
*whole, peeled San Marzano tomatoes, kosher salt, and oregano (blended). Do not warm, sauce cooks in the oven.
Making this pizza was important to me because I wanted to make a truly authentic Neapolitan style pizza, like the one Spaghetti made for me in Boston. So, I called him up and he helped me out with the sauce and all the essentials.
 I love this pizza because the ingredients are so simple, but the flavors are so vibrant. What I’ve learned about Italian cooking is that they like to keep things simple, fresh and rustic. They use good quality ingredients, and let them shine on their own.
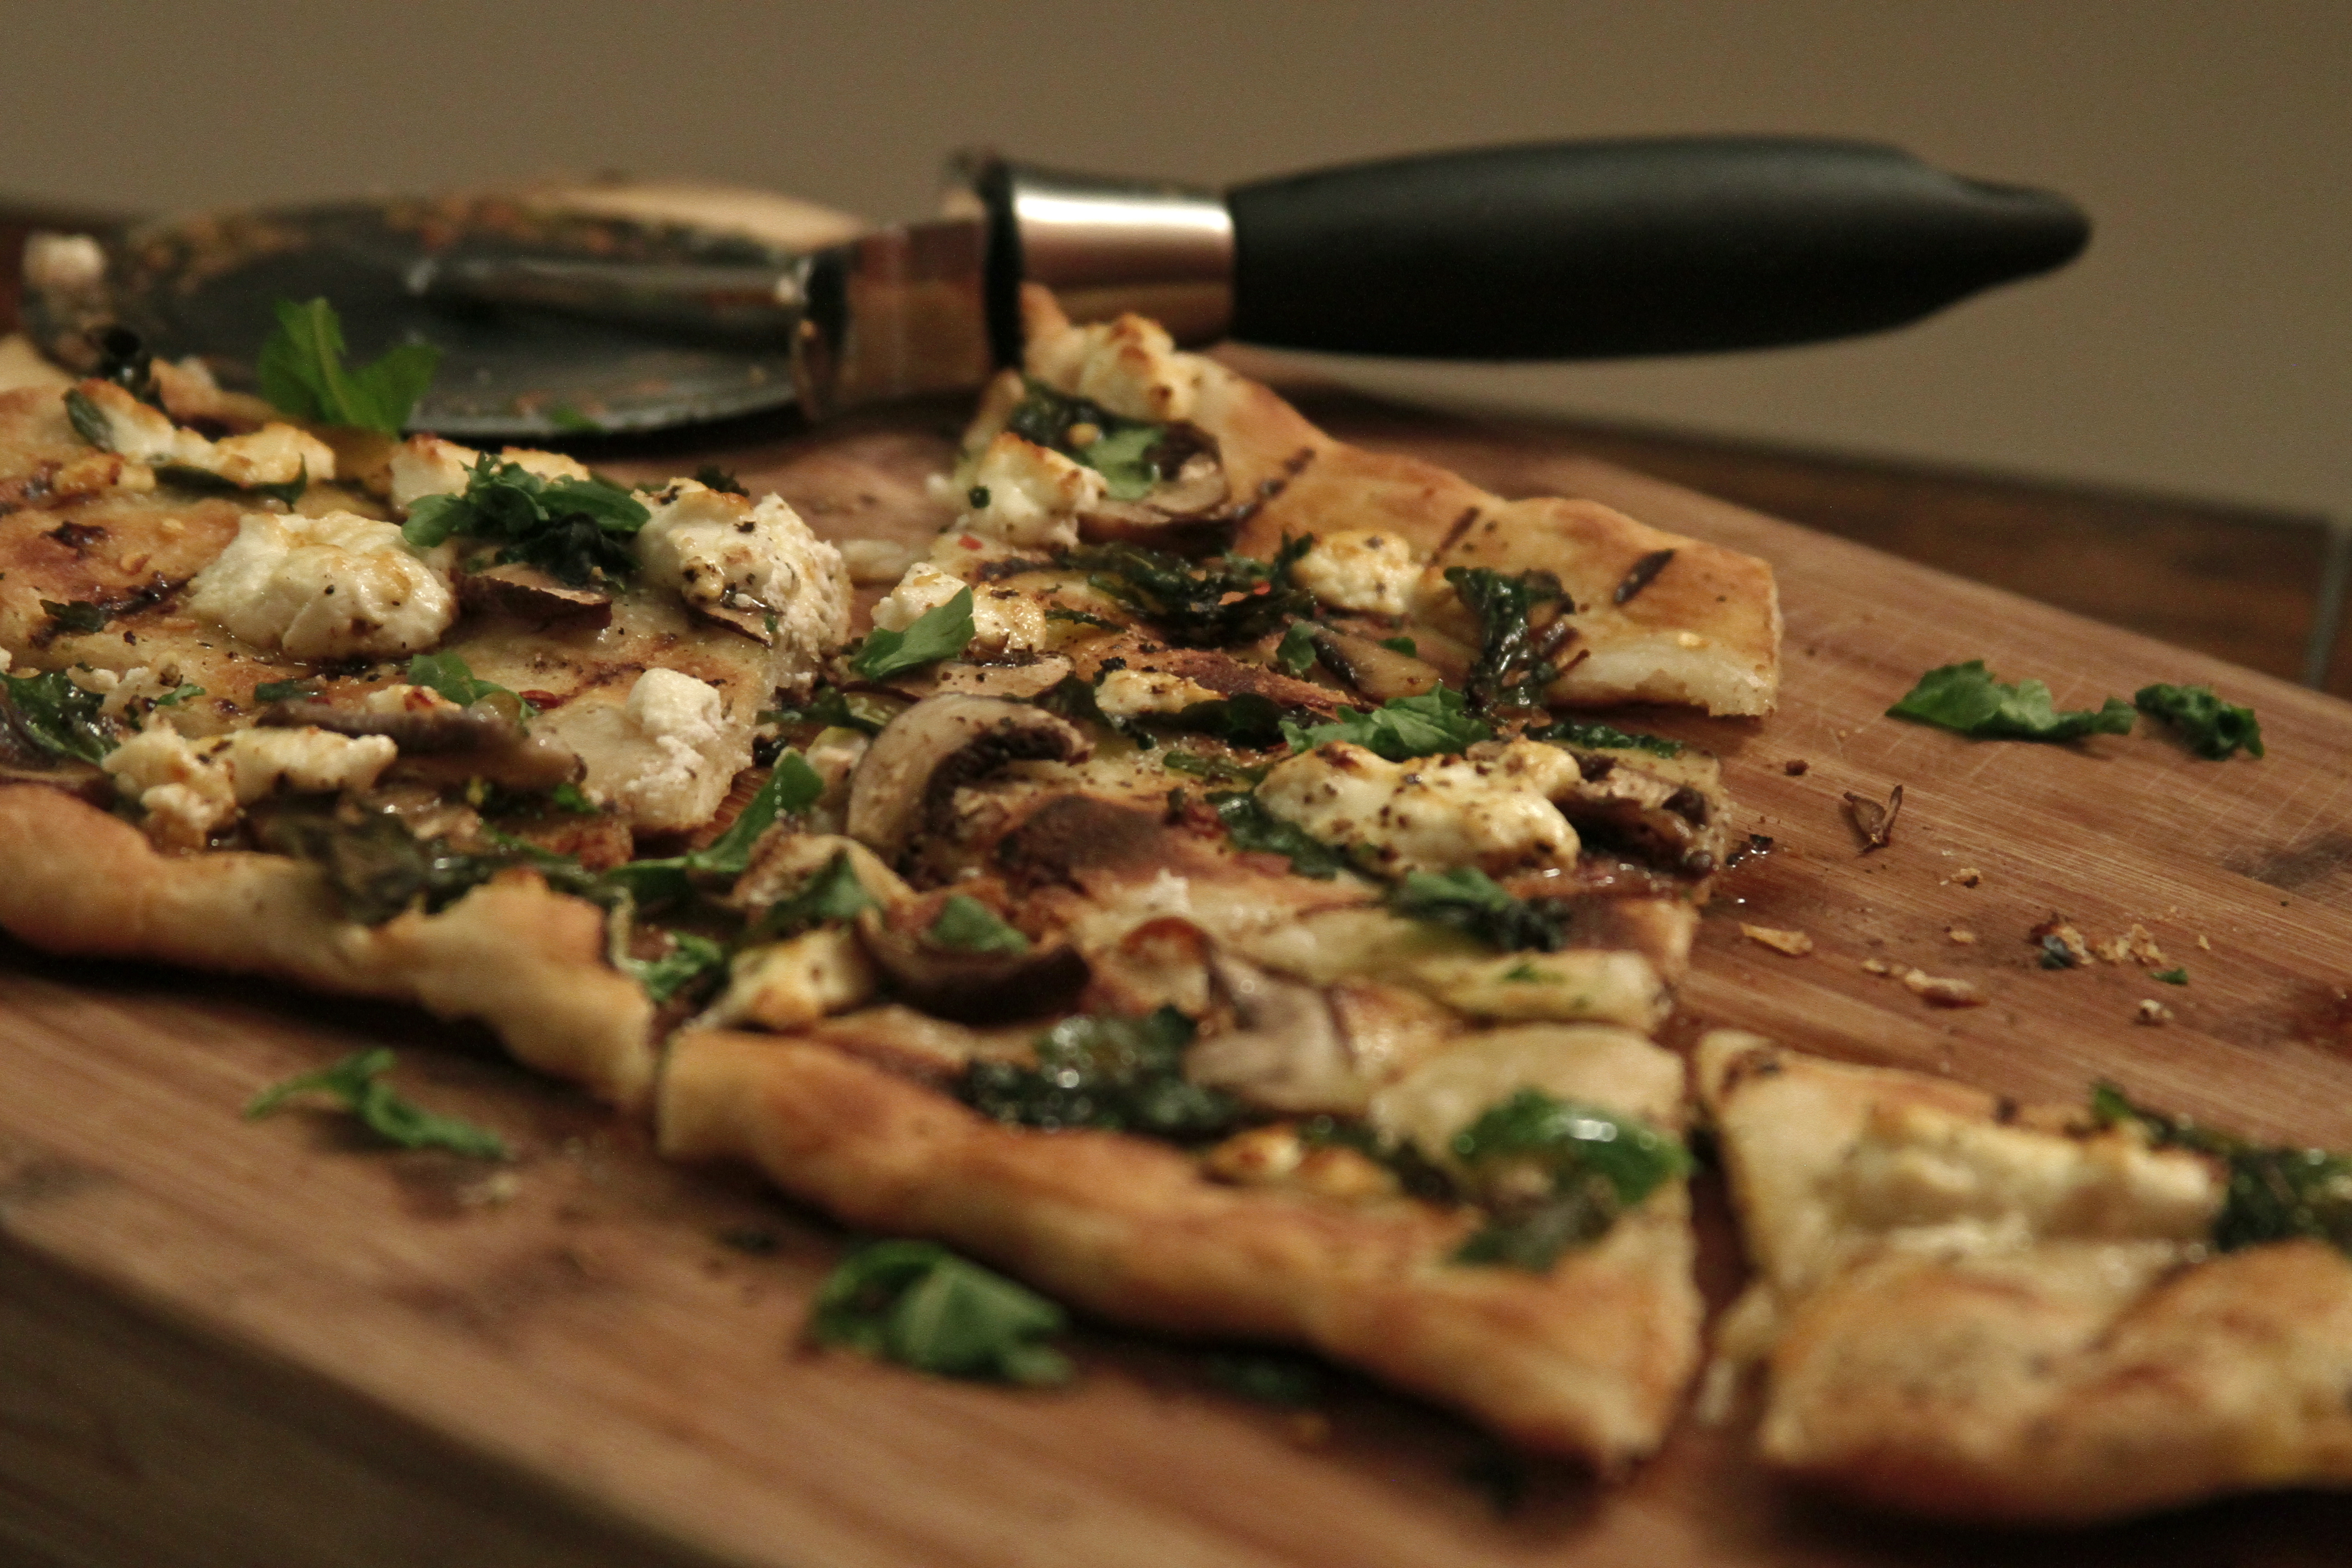
Course two: Mushroom, truffle oil, and arugula

Ingredients
cremini mushrooms
goat cheese
arugula
truffle oil
olive oil
The inspiration for this pizza actually came from the restaurant I work at in Culver City, called the Overland. We recently added flatbread pizzas to our menu and my favorite one has mushrooms, arugula, and burrata cheese. I wanted to recreate that, but put my own spin on it.
 I added truffle oil and used goat cheese instead of burrata. I thought that the tanginess of the goat cheese would pair nicely with the peppery arugula and cut through the pungent, rich flavor of the truffle oil.
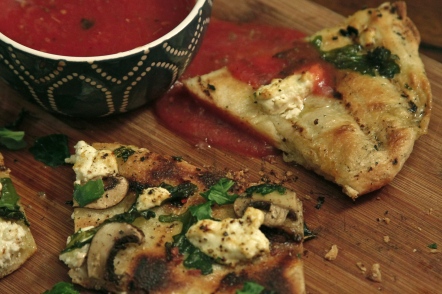
Because we didn’t use a sauce for this one, we thought it came out a bit dry. If I were to make it again, I think I’d make a bechamel (white sauce) to put on it as well, which is actually what they do at my work. You win this time, Overland. Luckily, I had plenty of sauce left over from the Margherita, so we used it as a dipping sauce.
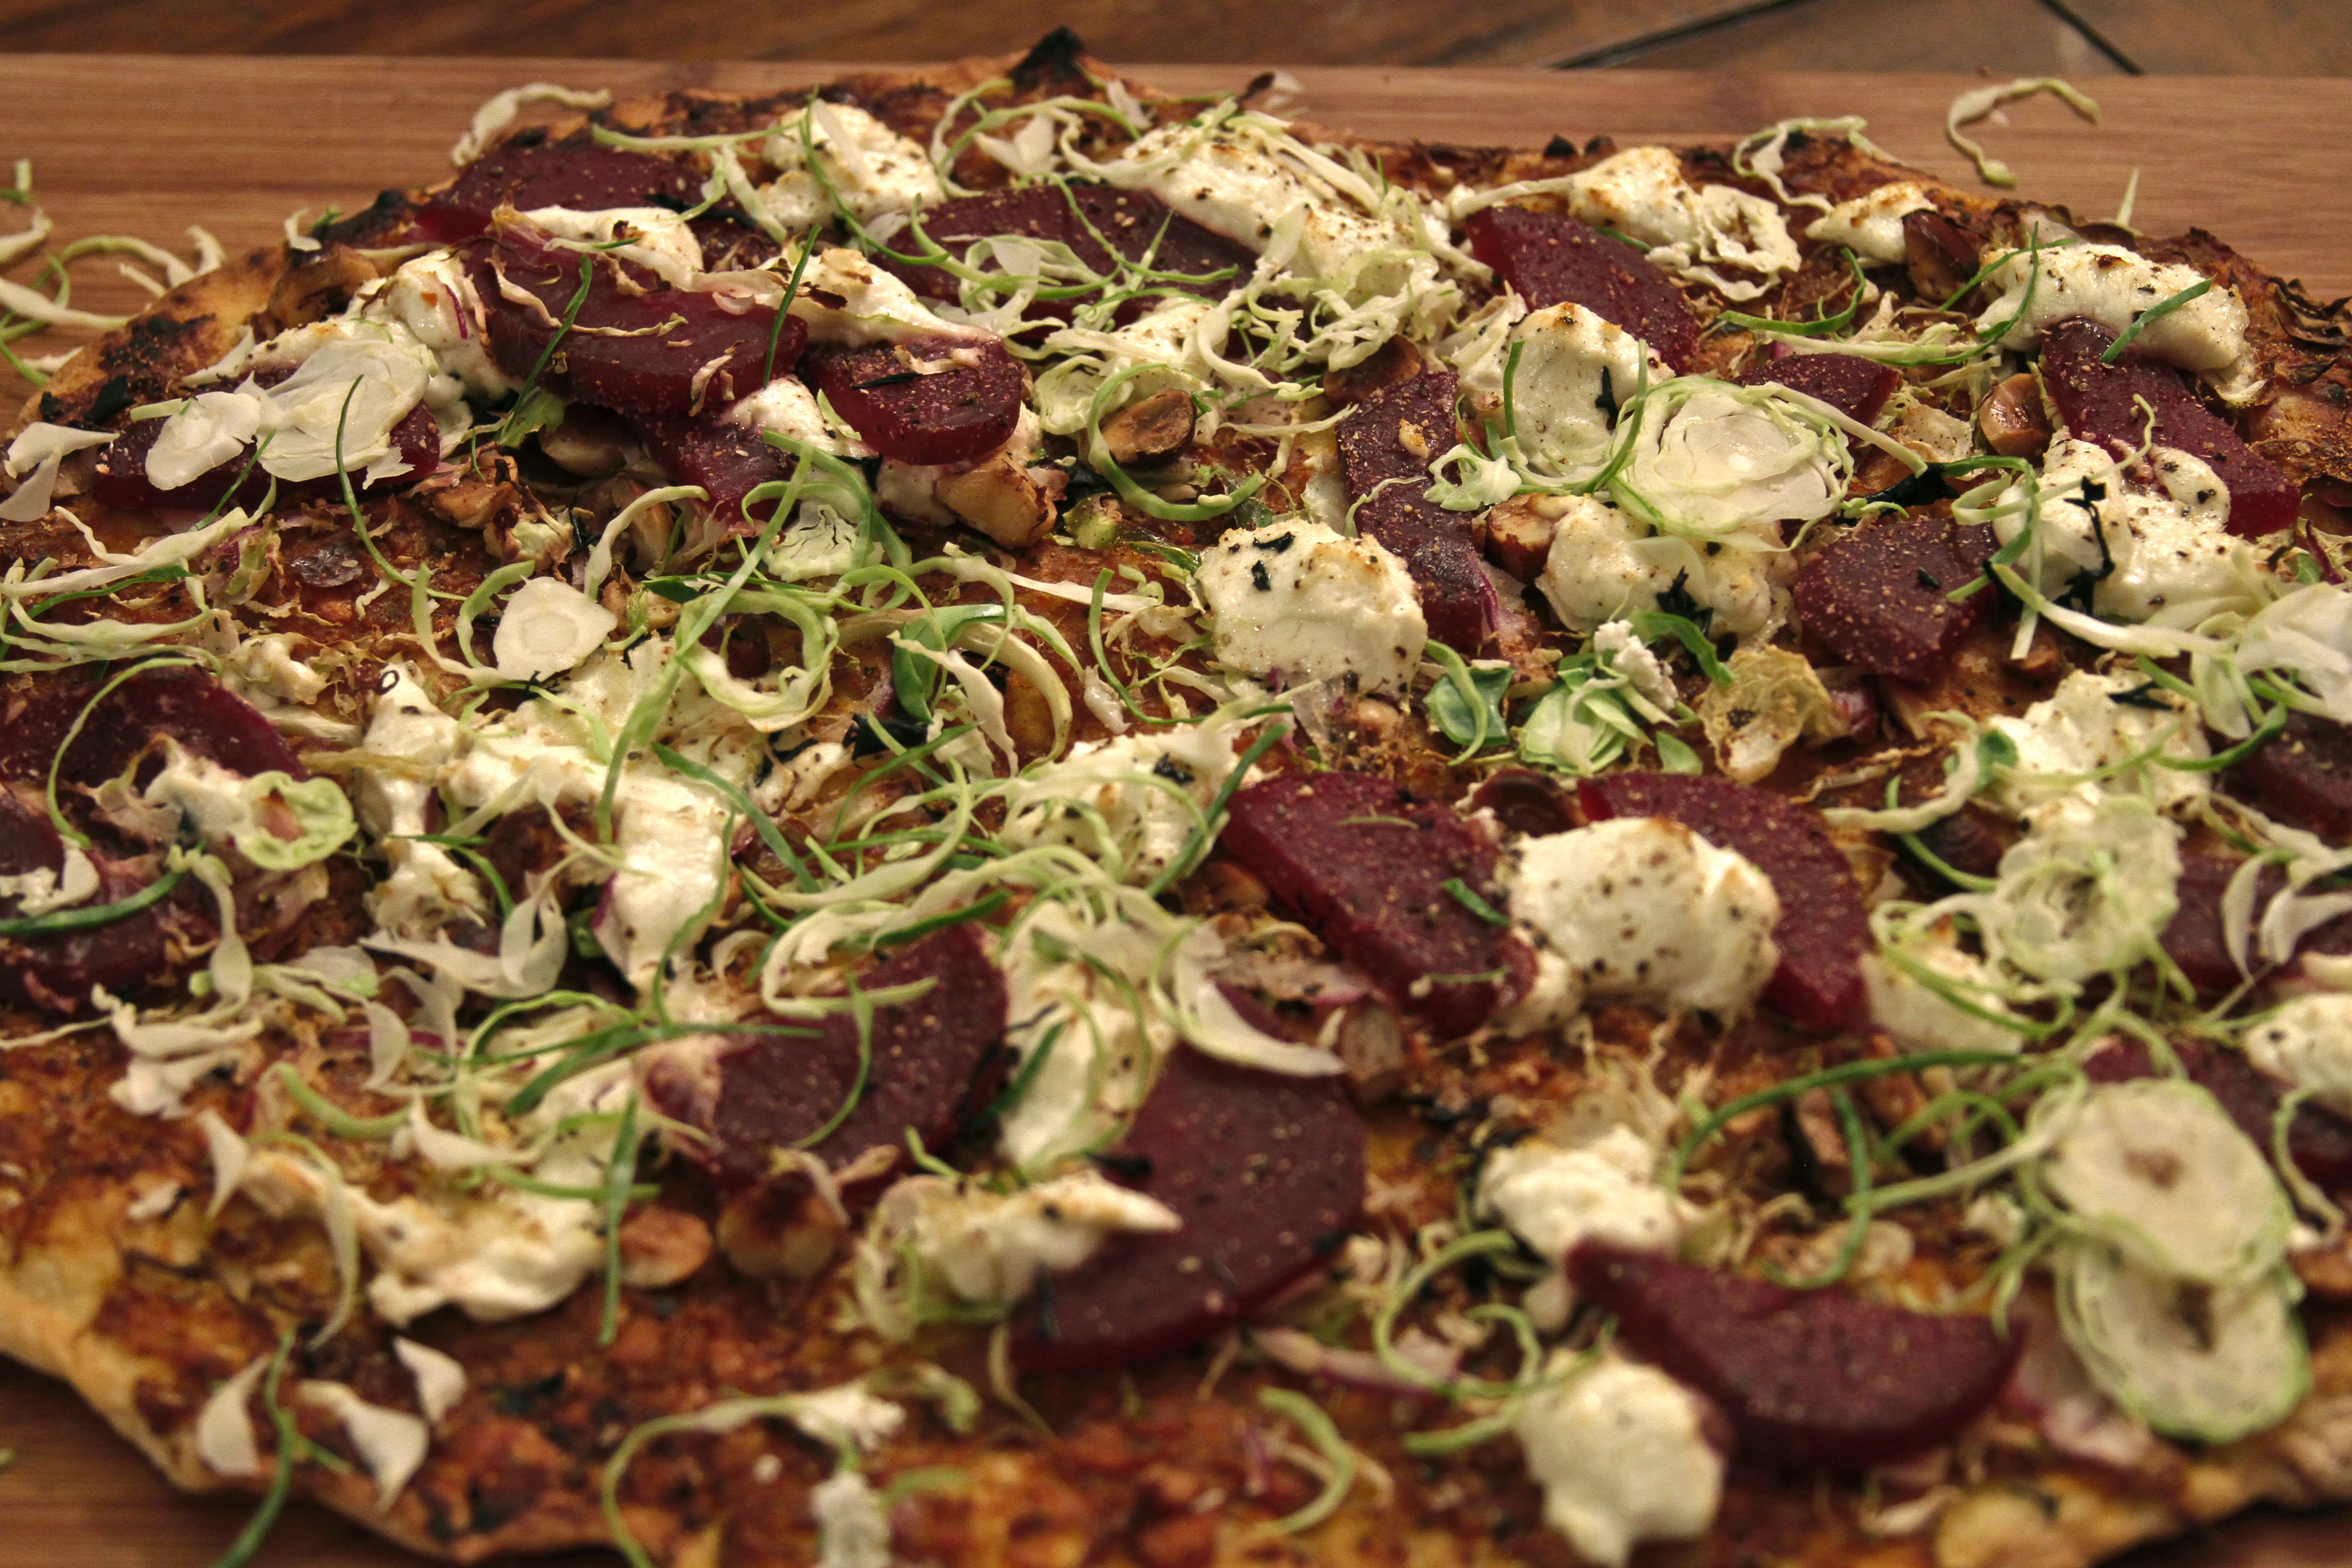
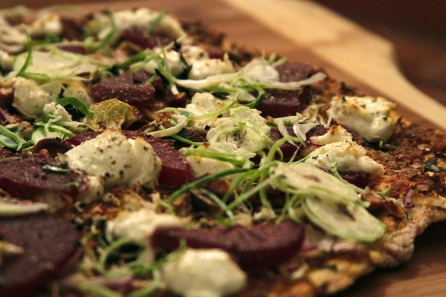
Course three: Roasted curry carrot with beets and shaved Brussels sprouts

Ingredients
beets
shaved Brussels sprouts
toasted hazelnuts
goat cheese
carrot curry sauce*
*I have no idea what’s in this sauce, you’re gonna have to wing it or call my brother.
This pizza was designed by my brother after eating at one of his favorite places in New Orleans called, Domenica, which in Italian means, Sunday. It’s hilarious to me that he chose to make this one because it’s rare that he eats vegetarian pizza. He one time said and I quote, “I need meat. I’m not in the mood for a f***ing farmer’s delight,” when we were deciding which pizza to order. Yikes.
 Anyway, I guess one of the locals at this place suggested the Roasted Carrot pizza and he was in the mood for a f***ing farmer’s delight that day. He said it was one of the best pizzas he’s ever had, so here we are. I don’t know what the pizza at Domenica tasted like, but if it was anything like this, I suggest you check it out if you’re ever in New Orleans.
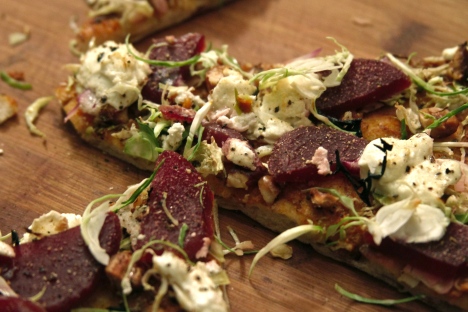 I’m a huge fan of the beets and goat cheese combo, so that made me happy right off the bat. The nuttiness from the hazelnuts paired well with the curried carrots, and the crunch of the sprouts made it all come together. Not only was it tasty, but it was beautiful as well. I love how rustic and bright this pizza is.
We decided if there was one thing we would change, it would be to add some sort of cream element to the sauce to make it a bit more, well.. saucy. But I think that’s what makes cooking fun. People think they aren’t allowed to make mistakes, but that’s how we learn and become better cooks. Speaking of mistakes.
Course four: Proscuitto, sage, and fig jam

Ingredients
proscuitto
fresh sage
mushroom brie
fig jam
This was sort of our “we have four pizzas, but only three ideas, what the hell should we put on the last one?” pizza. I decided proscuitto would be a good idea, and then my brother and Adriana came up the rest by running across different items at the grocery store. Now don’t get me wrong, all of these ingredients have the potential to make up a very yummy pie, but the failure came in our execution and maybe one too many glasses of wine.
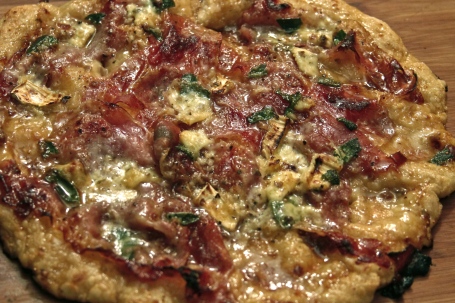 What I believe our thought process was, was to make it more of a dessert pizza since it was the final course. Smart. What we did to make this a dessert pizza, was simply douse it in copious amounts of fig jam. Not so smart. The end result was a much too sweet, sticky mess, that was kind of similar to eating a spoonful of jelly. We really just should have smeared some PB on it and called it a day.
However, this was the only pizza we made in the oven, and I thought it most resembled the way a Neapolitan style pizza cooks in a wood fired oven. So that was nice
My brother was so determined to not let the pizza go to waste, that he decided to repurpose it and make bread pudding. If you’re baffled as to how/why he did this, join the club. I’m sad to say I never tried the pudding, so I can’t tell you myself how it tasted, but I just talked to my brother and he said it’s still sitting in the fridge, untouched—it’s been a week. I’m making him try it, now. Stay tuned.
Waiting.
Waiting.
Okay, he just called with the verdict. His words, “Dude, this is f***ing bomb.” So there you have it, folks. If at first you don’t succeed, make that shit into bread pudding. #wordsofwisdom
And, finally, here’s the recipe for Neapolitan style pizza dough (2 day method). Enjoy.
Ingredients
- 5 cups Italian “00” flour (you can find this at Whole Foods)
- 2 tsp kosher salt
- 1 tsp instant yeast
- 14 oz room temperature water
Instructions
Add all dry ingredients to large mixing bowl and stir. Add water and mix for about 2 minutes. I used my hands, but you could use a Kitchenaid mixer if you have one.
Let the dough rest for 5 minutes, and then mix for another 2 minutes.
Take the dough out of the bowl and stretch and fold dough into a ball. I’m not 100% sure on the correct way to do this, but I just kind of stretched it apart and then folded it under, tucking it into a ball shape. Cover the dough with a bowl and let rest for 5 minutes.
Perform three more stretch and folds every 5 minutes. Transfer the dough to a bowl big enough for it to double in size. Cover the bowl and place in the refrigerator for 24 hours.
The recipe says to take the dough out and divide it into 4 sections and form into balls at this point, but I just left it in the fridge for the additional 24 hours and cut it up into balls when I was ready to make the pizzas.
When you are ready to make the pizza, take the balls out of the fridge and bring them up to room temp. Flour a large, flat surface, such as a counter top, and begin forming the pizza. I just gently stretched the dough apart using my hands until I formed a shape/thickness I liked. You want it to be thin, but not so thin that it will fall apart when you put your toppings on. Transfer the dough to a pizza paddle or something that’s easily transferable to your cooking source. Top the pizza with any ingredients you like. Feel free to try out some of mine, above.
To bake the pizza
If you’re using an oven:
Preheat your oven to the highest temperature it will go for 45 minutes with a pizza stone in the oven (you can use a cookie sheet if you don’t have a pizza stone). Put the pizza on the stone and bake until edges are charred and the dough and toppings are cooked through.
If you’re using a grill:
Oil the grill (not with spray) to prevent the dough from sticking. Briefly cook the dough on both sides creating grill marks before adding the toppings. Take off the grill to add all the fixings and then transfer the pizza back on the grill until toppings are to your desired doneness.
*These methods were an experiment for us, so you may find a method that is easier or works better for you. Be creative. Best of luck.
A BIG THANK YOU TO MY BROTHER FOR TAKING ALL THE BEAUTIFUL PHOTOS!!


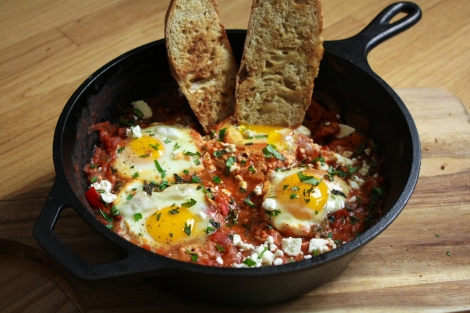 Oh, and did I mention the bread!? The bread might be the best part of the whole dish. It’s served with a side of crusty bread you can use to sop up all the delicious, tomatoey sauce and gooey yolk. Mmmmmm. I actually just used the bread as a spoon throughout the whole meal. I mean, what’s better than a spoon you can eat??